Namitsugi Cob | 24 Jan. 2010
In this section, I will explain the process of "guide installation," which will be the final task in rod building.
A guide is used to allow the line to be cast and reeled smoothly without resistance, and its shape varies depending on the target fish and fishing style.
I use guides with SiC (Silicon Carbide) rings. SiC has excellent heat dissipation properties that allow it to release the high heat generated at the contact point between the guide and the line during battles with large fish. Therefore, it is considered the best material for guides. The guide frame itself is made of rust-resistant stainless steel. There are also titanium guides available that offer enhanced rigidity and lightweight properties, but they are quite expensive, so it depends on your budget if you choose to use them.
For my carp fishing style (using a baitcasting reel), I prefer relatively small guides with two legs, and I use the "Striped beakfish" guides when purchasing them as a set. The set includes the required number of guides for an 18-foot rod. When using them for the Sumida river Special (SS) rod, I have a few guides left as spares. These spares are stored for future use. I purchased the guides for the SS3 model for around 8,000 yen on an online auction. If you prefer to buy the necessary number of guides separately, SAKURAI & CO,.LTD in Kanda is convenient. They offer a variety of options, including guides with gold plating or crystal rings, allowing you to choose the ones you like. They also provide expert advice on installation positions and more. Therefore, when purchasing guides from Sakurai, don't forget to bring your rod along.
Once you have purchased the guides, it's time for the installation. Instead of determining the number of guides based on the length of the rod, we will decide the installation positions and quantities based on the characteristics of each individual rod. If the line interferes with the rod when it is retracted, it means you have too few guides, and if you have an excessive number of guides, it will affect the rod's performance. The guides should be kept to the minimum necessary.
To determine the positions, start by temporarily attaching the top guide and the guide on the handle side above the reel seat. Flex the rod and observe the bending point, which indicates the position for the next guide. Determine the positions on the tip side and the handle side by tightening the rod with several guides around the chosen guide, ensuring that the line does not interfere with the rod.
For temporary attachment of the guides, I use easily removable tape like masking tape instead of adhesive. Using adhesive would dirty the rod if you need to change the guide's position and ruin the paintwork you've done.
Once the guide positions are determined, loosen the temporary attachment and remove the guides. Make sure to mark them for reference. The next step before thread wrapping is finishing the guide feet. It is convenient to use a table vise, where you can place the guide and check if it sits horizontally. If there is any misalignment, correct it at this stage. Next, work on finishing the guide feet. Use a file to shape the tip of the feet. Apply the file vertically to the feet so that the thread can be wrapped easily. Irregular notches can cause the thread to break during wrapping. Handle this process delicately and with care, applying minimal force.

Guide Wrapping (Using Nylon Thread for Repairs)
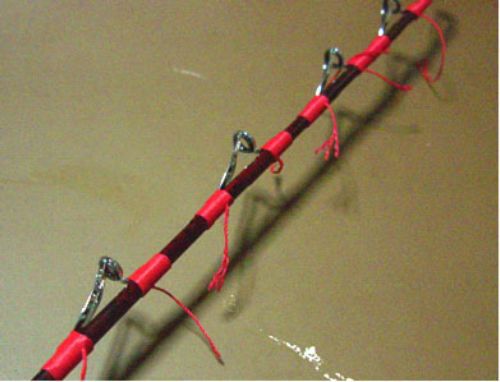
Once the preparation work is done, proceed with the installation. Attach the guides again using the reference marks made during positioning, securing them with masking tape. The key point here is not to wrap tape around the entire guide foot but to fix it with tape about 3mm wide closer to the ring. This is because when wrapping the thread, you will start from the outside and secure the tip of the foot with thread before removing the tape and wrapping the thread up to the guide ring.
During wrapping, just like with the rod base wrapping, ensure that the threads do not overlap and wrap them neatly without gaps. Avoid creating knots. Apply sufficient tension while wrapping firmly. Since no adhesive is used for guide installation, it is essential to secure them firmly with thread wrapping alone. It is desirable to use a strong thread, such as nylon repair thread, which provides the necessary strength. For the SS3 rod, I used a slightly thicker nylon repair thread.
After all the guides are installed, proceed with thread finishing. Use a cutter that cuts cleanly and carefully process the ends without leaving any exposed edges. Finally, apply a small amount of instant adhesive to the starting and finishing points of the thread with the tip of a toothpick.
Next, move on to the coating of the wrapped thread. The most common method is to use epoxy paint for coating, but for the SS3 rod, I will finish it using Urushi lacquer, just like the rod's main body. Since I prefer a more subtle color scheme, I will go with a "Black and Benitame-Urushi."

Finishing the guide wrapping and applying stickers for completion
Start by applying black. Repeat the process of painting and sanding until the thread weave is no longer visible (similar to the main body coating). Then, apply a thin layer of Benitame a few times. Again, follow the process of painting, drying, and sanding, which takes about a week for each cycle. It will take five weeks in total with three coats of black and two coats of benitame urushi. The wrapping process requires intricate work, different from the main body coating, and takes a considerable amount of time. In my case, it takes about an hour for each coat. I spend a similar amount of time on sanding, ensuring that I work diligently. As the completion nears, impatience may arise, but I always focus on doing a meticulous job.
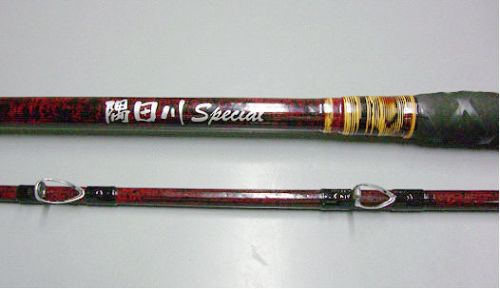
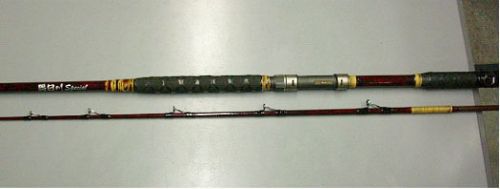
With this, the work is complete after one and a half years, from selecting the materials to this point. Using a soft cloth, polish it carefully. The sense of satisfaction that comes from completing this work can only be understood by those who have gone through the process. Finally, apply the original sticker for "Sumida River Special," and it is finished.

This winter, I plan to go fishing on the Sumida River and share my experiences, impressions, and usability. Thank you for accompanying me on this long journey. I encourage all of you to challenge yourself to create your own rod. It's enjoyable to catch big fish with a rod you've built yourself!