Namitsugi Cob | 19 Oct. 2008
The preliminary finish is an essential process in achieving strength and beauty in a fishing rod, ensuring a perfect final result. In simple terms, by attaching a reel seat and guides to a purchased fiberglass material, you can have a functional rod (although some reinforcement is necessary, especially at the ferrule). If your goal is merely to catch fish, that may be sufficient. However, for those of us who enjoy fishing, using a custom-made rod carries a sense of uniqueness and personal attachment ("your own rod" or "a one-of-a-kind rod" – at least it does for me!).
If you aspire to create a well-finished rod, it is crucial to meticulously carry out the preliminary finish, which I will now explain. For beginners in rod building, this process may seem tedious, but it is necessary for achieving a beautiful outcome. Take your time and proceed with patience, keeping in mind the goal of a fine finish.
Now, let's discuss the preliminary finish for the "Sumida River Special III" rod, which consists of the following steps:
1. Attaching the ferrule socket
2. Applying an underwrap to the blank material
3. Securing the underwrap thread
Step 1: Attaching the Ferrule Socket ( Socket Underwrap → Attachment ).
First, let me briefly explain the joint section in a jointed fishing rod. The joint section is the weakest part of a jointed fishing rod. Therefore, all jointed fishing rods have some form of reinforcement. In the case of bamboo rods, before the process of filing down the joint section's inner diameter, a thread is wrapped around the joint section and secured with Urushi (lacquer) to provide reinforcement. Afterward, the filing process and fitting process are carried out. Once the fitting is completed, a process called "Nakatame" is performed to adjust the shape of the bamboo, followed by entering the finishing process of the grip winding.
Firstly, let me explain a bit about the joint section in a jointed fishing rod. The joint section is the weakest part of a fishing rod, so all jointed fishing rods have some form of reinforcement. In the case of bamboo rods, before proceeding to the precision work of fitting the joints, thread wrapping and solidifying with Urushi (a lacquer) are done on the joint section. Then the fitting process continues with joint-fitting and finishing work. After the fitting is complete, a process called "Nakatame" is carried out to adjust the shape of the bamboo and move on to the finishing paintwork of the grip section.

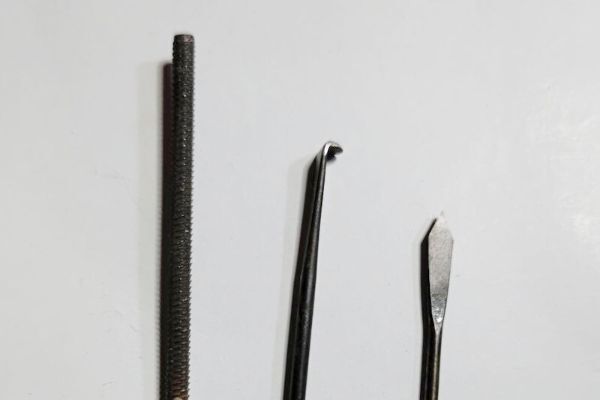
Bamboo rods are meticulously finished using three different tools to refine the holes in the joints.
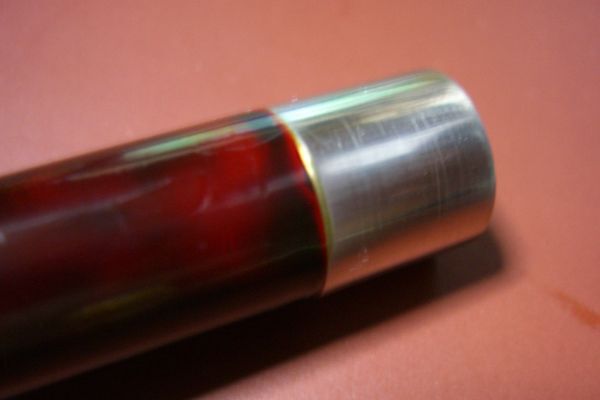
For fiberglass rods, the process is quite similar. After wrapping thread around the ferrule section for reinforcement, stainless steel ferrules are used to enhance the strength further. Ideally, the ferrule should be attached after completing the rod's overall painting. However, I personally dislike the noticeable transition between the rod's main body and the ferrule during this stage. To eliminate the visual gap between the painted rod and the ferrule, I prefer to attach the ferrule first and finish it seamlessly with the rod's painted surface. Both methods provide the same strength, but it is simply my personal preference.

Obtaining a seamless finish between the rod and the ferrule (Sumida River SP-1)
Unless you order custom-made ferrules tailored to the rod's thickness, it's unlikely to find a perfect fit. In the next step, when wrapping thread onto the rod and adjusting it with the ferrule, take into account the necessary space. Choose a ferrule considering this factor.
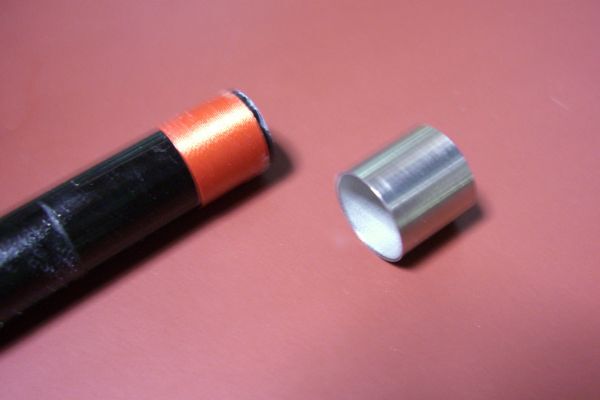
Now, let's begin the process of attaching the ferrule. Firstly, adjust the ferrule to the rod. The gap between the rod and the ferrule is likely around 1mm, so wrap thread with a thickness that matches the width of the ferrule (the thread material doesn't matter for this step). While applying a moderate tension, carefully wrap the thread flatly, ensuring that the threads don't overlap or create bumps.

Adjusting the rod and ferrule with thread wrapping
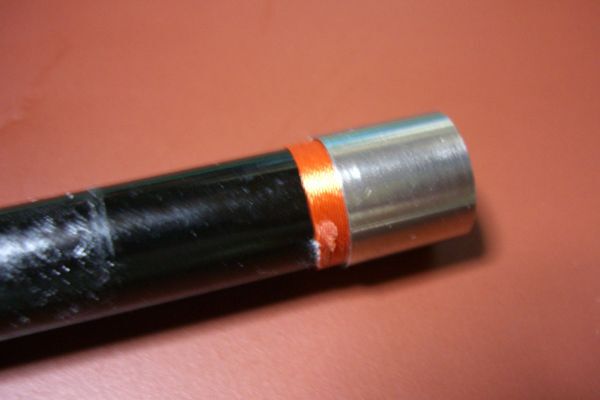
Once the thread wrapping is complete, use an epoxy-based adhesive to attach the ferrule. Be cautious not to let the adhesive seep into the jointed area. Epoxy-based adhesives are commonly used in rod building. Epoxy allows for filling gaps during the solidification process without changing its volume, making it possible to fill any gaps when necessary. By intentionally roughening the adhesive surfaces with sandpaper and filling both sides' gaps with epoxy, a stronger bond can be achieved compared to standard bonding methods (resulting in a better joint).

Attaching the ferrule with epoxy
Furthermore, unlike instant adhesives, epoxy provides ample working time before it begins to solidify. This allows for a more relaxed process during attachment, ensuring precise positioning and adjustments. While it takes more than a day for complete solidification, once fully cured, epoxy provides a remarkably strong bond.
Epoxy adhesives are available in different types labeled as 5-minute, 10-minute, 30-minute, indicating the time it takes to begin solidifying. Although I can't confirm their accuracy, it is believed that epoxy with a longer solidification time offers a stronger bond.
In the case of attaching the ferrule, you need to complete the following steps before the adhesive begins to solidify: "Apply the adhesive → Position the ferrule → Wipe off any excess adhesive." (Using the 30-minute type might be more convenient as it allows for sufficient time to carry out the process.) After attaching the ferrule, let it sit undisturbed for a full day, ensuring complete bonding. The alignment between the underwrap thread and the ferrule must be meticulous and precise, as misalignment or excessive play between the underwrap thread and the ferrule could result in the ferrule shifting before the adhesive cures. It's challenging, but it's crucial to achieve the minimum required gap between the underwrap thread and the ferrule when the adhesive has reached the appropriate consistency.